-
내가 공부하려고 기록하는 객체지향 SOLID 원칙과 예제 코드Server/Spring 2024. 9. 20. 23:41반응형
객체 지향에 대해 공부하면 가장 처음 나오는 것이 SOLID 원칙이다.
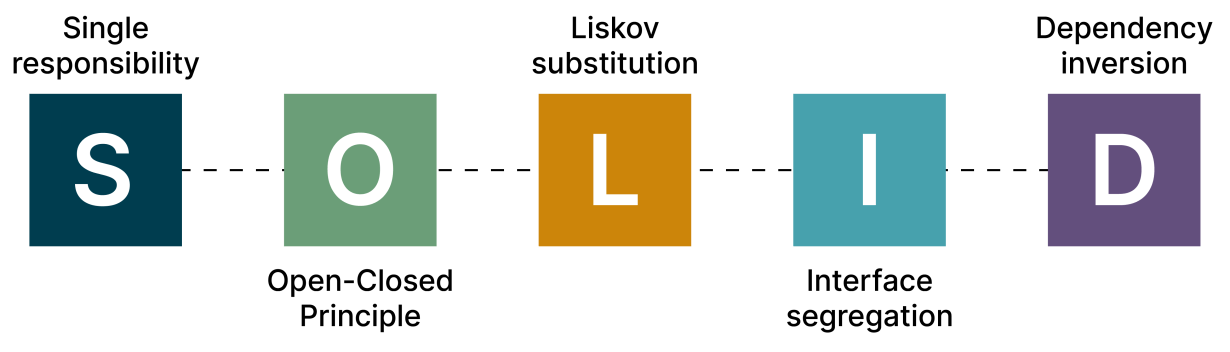
출처: Knoldus Blogs 객체 지향적으로 프로그래밍할 때 지켜야 하는 원칙 5가지를 나타내는 약어인데, 아래에서 각각의 알파벳이 무엇을 나타내는지 차례대로 알아보자.
Single Responsibility Principle 단일 책임 원칙
Open/Closed Principle 개방/폐쇄 원칙Liscov's Substitution Principle 리스코프 치환 원칙
Interface Segregation Principle 인터페이스 분리 원칙
Dependency Inversion Principle 의존성 역전 원칙
이렇게 5개의 원칙을 보고 바로 어떤 원칙인지 감이 오는 천재 개발자분들도 있을 거고, 필자처럼 아리송하게 느껴지는 분들도 있을 것이다.
그래서 하나하나 코드를 한 번 같이 보면서 어떤 느낌인지 감을 잡아보도록 하자!
1. 단일 책임 원칙(SRP)
예시로, 날씨 프로그램을 만든다고 생각을 해보자.
날씨 프로그램은 아래와 같이 여러 기능을 포함해야한다.
1. 날씨 측정
2. 날씨 데이터 DB에 저장
3. 날씨 보고서 생성
4. 강우 경보 생성
등등...
이런 기능들을 아래 코드처럼 WeatherStation이라는 클래스에 한 번에 구현할 수 있다. 구현이 굉장히 빠르겠지만 이런 식으로 구현하게 되면 단일 책임 원칙에 위배된다.
public class WeatherStation {
    private double temperature;
    private double humidity;
    private double rainfall;

    public void measureWeather() {
        // 날씨 측정 로직
        temperature = 25.5;
        humidity = 60.0;
        rainfall = 10.5;
    }

    public void saveWeatherData() {
        // 데이터베이스에 날씨 데이터 저장 로직
        System.out.println("날씨 데이터를 데이터베이스에 저장했습니다.");
    }

    public void generateWeatherReport() {
        // 날씨 보고서 생성 로직
        System.out.println("날씨 보고서:");
        System.out.println("온도: " + temperature + "°C");
        System.out.println("습도: " + humidity + "%");
        System.out.println("강우량: " + rainfall + "mm");
    }

    public void alertHighRainfall() {
        if (rainfall > 100) {
            System.out.println("경고: 폭우 주의보!");
        }
    }
}
원칙에 따라 코드를 작성한다면 날씨 측정, 저장, 보고서 생성, 강우 경보와 같은 기능들을 별도의 클래스로 나눠서 만들고 이것들을 각각 별도의 컴포넌트로 오브젝트에 부착해야 한다.
// 날씨 측정을 담당하는 클래스
public class WeatherSensor {
    private double temperature;
    private double humidity;
    private double rainfall;

    public void measureWeather() {
        // 날씨 측정 로직
        temperature = 25.5;
        humidity = 60.0;
        rainfall = 10.5;
    }

    public double getTemperature() { return temperature; }
    public double getHumidity() { return humidity; }
    public double getRainfall() { return rainfall; }
}

// 날씨 데이터 저장을 담당하는 클래스
public class WeatherDataStorage {
    public void saveWeatherData(double temperature, double humidity, double rainfall) {
        // 데이터베이스에 날씨 데이터 저장 로직
        System.out.println("날씨 데이터를 데이터베이스에 저장했습니다.");
    }
}

// 날씨 보고서 생성을 담당하는 클래스
public class WeatherReportGenerator {
    public void generateWeatherReport(double temperature, double humidity, double rainfall) {
        System.out.println("날씨 보고서:");
        System.out.println("온도: " + temperature + "°C");
        System.out.println("습도: " + humidity + "%");
        System.out.println("강우량: " + rainfall + "mm");
    }
}

// 강우 경보를 담당하는 클래스
public class RainfallAlertSystem {
    public void checkRainfall(double rainfall) {
        if (rainfall > 100) {
            System.out.println("경고: 폭우 주의보!");
        }
    }
}

// 전체 날씨 시스템을 조정하는 클래스
public class WeatherStation {
    private WeatherSensor sensor;
    private WeatherDataStorage storage;
    private WeatherReportGenerator reportGenerator;
    private RainfallAlertSystem alertSystem;

    public WeatherStation() {
        sensor = new WeatherSensor();
        storage = new WeatherDataStorage();
        reportGenerator = new WeatherReportGenerator();
        alertSystem = new RainfallAlertSystem();
    }

    public void runWeatherMonitoring() {
        sensor.measureWeather();
        storage.saveWeatherData(sensor.getTemperature(), sensor.getHumidity(), sensor.getRainfall());
        reportGenerator.generateWeatherReport(sensor.getTemperature(), sensor.getHumidity(), sensor.getRainfall());
        alertSystem.checkRainfall(sensor.getRainfall());
    }
}
이렇게 했을 때 이전 코드와의 차이점은, 단일 책임 원칙을 지킨 경우 각각의 컴포넌트만 수정할 수 있지만 지키지 않은 경우 모든 코드를 수정해야 한다. 그리고 분리했을 때는 아래와 같은 장점이 있다.
1. 가독성이 좋아진다. 코드의 길이가 짧아지기 때문이다.
2. 확장성이 좋아진다. 하나의 기능만으로 이루어져서 이 클래스를 상속받아 확장하기 용이하다.
3. 재사용성이 좋아진다. 모듈 식으로 기능을 여기저기 사용할 수 있다.
2. 개방/폐쇄 원칙(OCP)
이 원칙은 클래스가 확장에는 개방되어 있고 수정에는 닫혀있어야 한다는 원칙이다.
쉽게 말하자면, 원본 코드를 수정하지 않고 새로운 동작을 추가할 수 있어야 한다.
아래 코드로 예를 들어보자. 새로운 날씨 유형을 추가할 때마다 if-else 문을 추가해줘야 하는 코드는 OCP(개방 폐쇄 원칙)이 지켜지지 않은 코드라고 볼 수 있다. 이렇게 수정이 잦아지면 여러 휴먼에러가 발생할 가능성이 높아진다.
public class WeatherAnalyzer {
    public void analyzeWeather(String weatherType) {
        if (weatherType.equals("Sunny")) {
            System.out.println("날씨가 맑습니다. 야외 활동하기 좋은 날입니다.");
        } else if (weatherType.equals("Rainy")) {
            System.out.println("비가 오고 있습니다. 우산을 챙기세요.");
        } else if (weatherType.equals("Cloudy")) {
            System.out.println("구름이 많습니다. 날씨가 변할 수 있으니 주의하세요.");
        }
        // 새로운 날씨 유형을 추가할 때마다 여기에 새로운 if-else 문을 추가해야 합니다.
    }
}

public class WeatherApp {
    public static void main(String[] args) {
        WeatherAnalyzer analyzer = new WeatherAnalyzer();
        analyzer.analyzeWeather("Sunny");
        analyzer.analyzeWeather("Rainy");
    }
}
그래서 수정을 하지 않고도 계속 기능을 추가할 수 있도록 코드를 설계해야 한다.
하지만, 아래와 같이 원칙을 지킨 코드는 새로운 날씨 State 클래스만 만들어주면, WeatherAnalyzer 클래스는 수정할 필요 없는 확장에는 열려있고 수정에는 닫힌 구조가 되었다.
// 날씨 분석을 위한 인터페이스
public interface WeatherState {
    void analyze();
}

// 맑은 날씨 상태 클래스
public class SunnyState implements WeatherState {
    @Override
    public void analyze() {
        System.out.println("날씨가 맑습니다. 야외 활동하기 좋은 날입니다.");
    }
}

// 비 오는 날씨 상태 클래스
public class RainyState implements WeatherState {
    @Override
    public void analyze() {
        System.out.println("비가 오고 있습니다. 우산을 챙기세요.");
    }
}

// 흐린 날씨 상태 클래스
public class CloudyState implements WeatherState {
    @Override
    public void analyze() {
        System.out.println("구름이 많습니다. 날씨가 변할 수 있으니 주의하세요.");
    }
}

// 날씨 분석기 클래스
public class WeatherAnalyzer {
    public void analyzeWeather(WeatherState state) {
        state.analyze();
    }
}

// 날씨 앱 클래스
public class WeatherApp {
    public static void main(String[] args) {
        WeatherAnalyzer analyzer = new WeatherAnalyzer();
        analyzer.analyzeWeather(new SunnyState());
        analyzer.analyzeWeather(new RainyState());

        // 새로운 날씨 상태를 쉽게 추가할 수 있습니다
        analyzer.analyzeWeather(new CloudyState());
    }
}
3. 리스코프 치환 원칙(LSP)
다른 원칙들은 이름을 들으면 아~ 하고 기억이라도 나는데 이 녀석은 이름마저 어렵다.
이름 그대로 리스코프 씨가 발표한 원칙인데 상속을 할 때 지켜야 하는 원칙으로, 파생클래스가 기본 클래스를 대체할 수 있어야 한다라는 원칙이다.
좀 더 쉬운 말로 풀이하자면 하위 클래스는 어떠한 경우에도 부모 클래스를 대체할 수 있어야 한다는 것이다.
마찬가지로 코드를 살펴볼 건데, 좀 더 심화된 예제를 보겠다.
public class WeatherForecast {
    protected double temperature;

    public WeatherForecast(double temperature) {
        this.temperature = temperature;
    }

    public void displayForecast() {
        System.out.println("오늘의 기온: " + temperature + "°C");
    }
}

public class RainyForecast extends WeatherForecast {
    private double rainfall;

    public RainyForecast(double temperature, double rainfall) {
        super(temperature);
        this.rainfall = rainfall;
    }

    @Override
    public void displayForecast() {
        if (rainfall < 0) {
            throw new IllegalArgumentException("강수량은 음수일 수 없습니다.");
        }
        System.out.println("오늘의 기온: " + temperature + "°C, 강수량: " + rainfall + "mm");
    }
}

public class WeatherApp {
    public static void main(String[] args) {
        WeatherForecast forecast = new WeatherForecast(25);
        forecast.displayForecast();

        // LSP 위반: RainyForecast 객체가 WeatherForecast를 완전히 대체할 수 없음
        WeatherForecast rainyForecast = new RainyForecast(20, -5);
        rainyForecast.displayForecast(); // 예외 발생
    }
}
이 코드는 리스코프 치환 원칙을 위반하고 있다. 그 이유는, RainyForecast 클래스가 WeatherForecast의 하위 클래스이지만, displayForecast 메서드에서 새로운 예외를 발생시킬 수 있기 때문이다. 이렇게 된다면 WeatherForecast 타입의 객체를 사용하는 코드가 RainyForecast 객체로 대체될 때 예상치 못한 동작을 할 수 있음을 의미한다.
그러면 어떻게 해결할 수 있냐 하면 아래와 같은 방법들을 사용할 수 있다.
1. 기본 클래스를 좀 더 간단하게 만들기
2. 기본 클래스를 좀 더 분류해서 만들기
3. 상속을 쓰는 것보다는 인터페이스를 생성해서 여러 인터페이스를 조합하기
public interface WeatherForecast {
    void displayForecast();
}

public class BaseForecast implements WeatherForecast {
    protected double temperature;

    public BaseForecast(double temperature) {
        this.temperature = temperature;
    }

    @Override
    public void displayForecast() {
        System.out.println("기본 날씨 예보 - 기온: " + temperature + "°C");
    }
}

public class SunnyForecast implements WeatherForecast {
    private BaseForecast baseForecast;

    public SunnyForecast(double temperature) {
        this.baseForecast = new BaseForecast(temperature);
    }

    @Override
    public void displayForecast() {
        System.out.print("맑은 ");
        baseForecast.displayForecast();
    }
}

public class RainyForecast implements WeatherForecast {
    private BaseForecast baseForecast;
    private double rainfall;

    public RainyForecast(double temperature, double rainfall) {
        this.baseForecast = new BaseForecast(temperature);
        setRainfall(rainfall);
    }

    private void setRainfall(double rainfall) {
        if (rainfall < 0) {
            throw new IllegalArgumentException("강수량은 음수일 수 없습니다.");
        }
        this.rainfall = rainfall;
    }

    @Override
    public void displayForecast() {
        System.out.print("비 오는 ");
        baseForecast.displayForecast();
        System.out.println("예상 강수량: " + rainfall + "mm");
    }
}

public class WeatherApp {
    public static void main(String[] args) {
        WeatherForecast sunnyForecast = new SunnyForecast(25);
        WeatherForecast rainyForecast = new RainyForecast(20, 5);

        displayWeather(sunnyForecast);
        displayWeather(rainyForecast);

        try {
            WeatherForecast invalidRainyForecast = new RainyForecast(20, -5);
        } catch (IllegalArgumentException e) {
            System.out.println("오류: " + e.getMessage());
        }
    }

    public static void displayWeather(WeatherForecast forecast) {
        forecast.displayForecast();
    }
}
개선한 코드에서는, WeatherForecast를 인터페이스로 정의하여 모든 날씨 예보 유형이 구현해야 할 메서드를 선언하고 BaseForecast 클래스를 만들어 기본적인 날씨 예보 기능을 구현했다. 이 클래스는 WeatherForecast 인터페이스를 구현하게 된다.
그리고 SunnyForecast와 RainyForecast 클래스도 WeatherForecast 인터페이스를 직접 구현하게 되는데, 내부에 BaseForecast의 인스턴스를 가지고 있어 기본 기능을 재사용할 수 있다. 상속 대신 컴포지션을 사용한 예시이다.
그리고 각 구체적인 예보 클래스는 자신의 특성에 맞게 displayForecast 메서드를 구현하게 만드는 방식이 더 바람직한 코드라고 볼 수 있다.
4. 인터페이스 분리 원칙(ISP)
리스코프 치환 원칙을 설명하며 인터페이스에 대한 얘기가 나왔었는데, 인터페이스를 사용할 때에도 지켜야 할 원칙이 있다.
바로 인터페이스 분리 원칙이다.
인터페이스를 사용할 때 한 번에 크게 사용하지 말고 작은 단위로 나눠서 사용하라는 원칙이다.
public interface WeatherStation {
    void measureTemperature();
    void measureWindSpeed();
    void measureSnowfall();
}

public class BasicWeatherStation implements WeatherStation {
    public void measureTemperature() {
        System.out.println("온도 측정");
    }

    public void measureWindSpeed() {
        System.out.println("풍속 측정");
    }

    public void measureSnowfall() {
        throw new UnsupportedOperationException("강설량 측정 기능 없음");
    }
}
예를 들어, 날씨에 관한 인터페이스가 있다면 위의 코드처럼 한번에 모든 것들을 넣지 말고 모든 것을 최대한 나누라는 것이다.
아래 코드처럼 온도 관련 인터페이스, 바람 관련 인터페이스, 눈 관련 인터페이스 등등 나누고 인터페이스들을 조합하는 형태로 코드를 발전시켜 나가는 것이다.
public interface TemperatureSensor {
    void measureTemperature();
}

public interface WindSensor {
    void measureWindSpeed();
}

public interface SnowfallSensor {
    void measureSnowfall();
}

public class BasicWeatherStation implements TemperatureSensor, WindSensor {
    public void measureTemperature() {
        System.out.println("온도 측정");
    }

    public void measureWindSpeed() {
        System.out.println("풍속 측정");
    }
}

public class AdvancedWeatherStation implements TemperatureSensor, WindSensor, SnowfallSensor {
    // 모든 메서드 구현
}
이런 식으로 인터페이스를 분리해서 쓸수록 코드 간의 결합도가 낮아지고 수정이 용이해진다.
5. 의존성 역전 원칙(DIP)
고수준 모듈이 저수준 모듈에서 직접 가져오면 안 된다 이런 내용인데, 말만 들어보면 이것도 직관적으로 이해하기 좀 어렵다.
이것도 예시를 통해 파악하면 좀 쉽다.
public class WeatherStation {
    public String getWeatherData() {
        return "현재 기온: 25°C, 습도: 60%";
    }
}

public class WeatherNotifier {
    private WeatherStation weatherStation;

    public WeatherNotifier() {
        this.weatherStation = new WeatherStation();  // 직접 생성 - DIP 위반
    }

    public void notifyWeather() {
        String weatherData = weatherStation.getWeatherData();
        System.out.println("날씨 알림: " + weatherData);
    }
}

public class WeatherApp {
    public static void main(String[] args) {
        WeatherNotifier notifier = new WeatherNotifier();
        notifier.notifyWeather();
    }
}
이 코드에서 WeatherNotifier는 구체 클래스인 WeatherStation에 직접 의존하고 있어 DIP를 위반한다. WeatherNotifier가 WeatherStation의 날짜 형식 말고 다른 형식을 따르고 싶을 때는 문제가 생기게 되는 것이다.
이제 WeatherNotifier에 WeatherStation을 직접 연결하는 것이 아니라 WeatherProvider라는 인터페이스를 생성해서 얘를 연결을 하는 것이다. 그리고 notifyWeather()에서 인터페이스의 메서드를 써주면 된다.
public interface WeatherProvider {
    String getWeatherData();
}

public class WeatherStation implements WeatherProvider {
    @Override
    public String getWeatherData() {
        return "현재 기온: 25°C, 습도: 60%";
    }
}

public class WeatherNotifier {
    private WeatherProvider weatherProvider;

    public WeatherNotifier(WeatherProvider weatherProvider) {
        this.weatherProvider = weatherProvider;  // 의존성 주입
    }

    public void notifyWeather() {
        String weatherData = weatherProvider.getWeatherData();
        System.out.println("날씨 알림: " + weatherData);
    }
}

public class WeatherApp {
    public static void main(String[] args) {
        WeatherProvider weatherStation = new WeatherStation();
        WeatherNotifier notifier = new WeatherNotifier(weatherStation);
        notifier.notifyWeather();
    }
}
이렇게 하면 예전에는 WeatherStation 형식으로만 알림을 줄 수 있었지만, 이제는 WeatherProvider 인터페이스를 가지고 있는 모든 객체들을 사용할 수 있게 되었다.
결론적으로, 특정 클래스에 직접적으로 의존하는 게 아니라 인터페이스를 거쳐서 사용하기 때문에 느슨한 결합이 이뤄지게 된다.
이것이 의존성 역전 원칙이다..!
마치며
이렇게 객체지향 SOLID 원칙에 대해 알아보았다.
소프트웨어 설계에서도 배우지만, 객체지향은 코드를 설계할 때 느슨한 결합과 높은 응집력을 목표로 해야 한다.
이것을 이루기 위해서 SOLID 원칙을 기본 원칙으로 삼고 계속 연습하면서 코드를 발전시켜 나가면 될 것이다.
처음에는 잘 안 되겠지만 객체지향의 GOSU가 되기 위해 계속 노력하자!
비가 오는 날엔 ~
RainyCode를 찾아와
밤을 새워 기다릴게...반응형'Server > Spring' 카테고리의 다른 글
싱글톤과 만능 스프링 컨테이너 (0) 2024.09.22